
When renovating your home, you might find a small corner that begs for a custom-fit beer cabinet—perfect for stocking your favorite craft and fresh beers while doubling as a stylish focal point. Many beer enthusiasts have this vision, but the customization process can easily lead to pitfalls: poor cooling performance, inefficient space utilization, or even clashing with your home decor.
Based on our own and friends’ customization experiences, Nenwell has compiled six critical points to focus on when customizing a compact beer cooler. From basic dimensions to detailed features, these insights help you avoid 90% of common pitfalls!
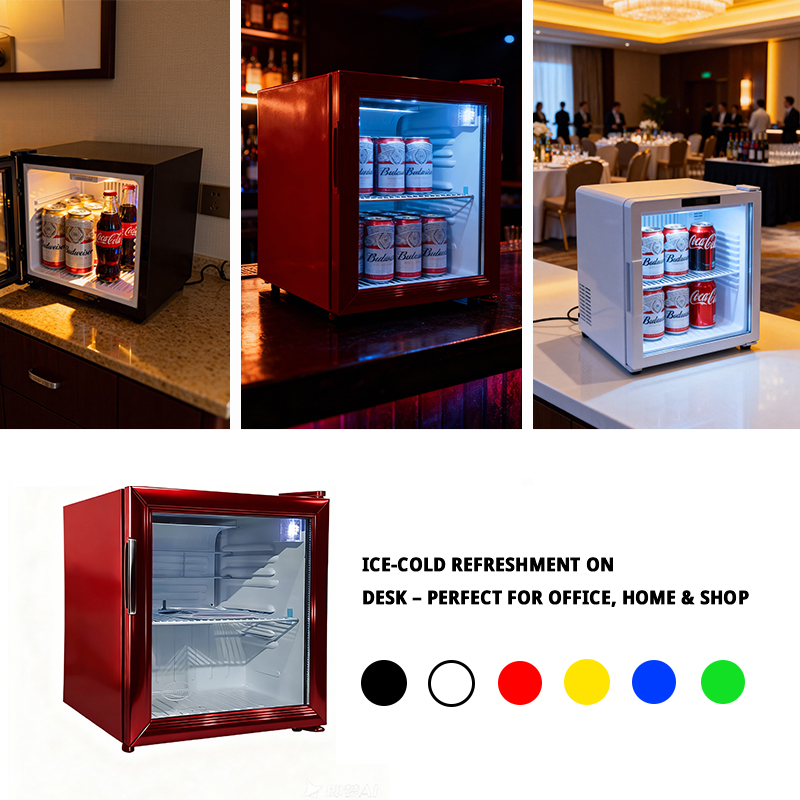
1. Dimensions: Don’t Just Aim for “Just Fits” – Leaving Space Is Key
The core advantage of customization is space optimization, but it absolutely isn’t about “forcing a tight fit”—many people stumble at this step.
Start with the basic dimensions: First determine the placement location, then calculate the internal capacity. First, clearly define where the beer cooler will go (next to the entryway cabinet, in a dining room corner, built-in on the balcony, etc.). Precisely measure the area’s length, width, and height, keeping errors within 1cm. The critical part is “reserving clearance”: Leave at least 5-10cm of ventilation space at the back (for built-in models, confirm ventilation requirements with the seller beforehand; some bottom-vented units can be wall-mounted). Allow 3-5cm above and 2-3cm on each side to prevent cooling failures due to poor airflow later. Additionally, consider the door opening style (left-opening, right-opening, sliding) and reserve sufficient space for door operation. For instance, if placing the unit against a wall, avoid models that only open outward, as this would prevent the door from opening.
Plan internal dimensions based on your primary beverage types to avoid wasted space. Before customizing: Determine if you’ll mainly store bottled craft beer (330ml, 500ml), canned beer, or occasionally red wine and glasses. For example: – If you frequently consume 330ml bottled craft beer, allow 25-30cm shelf height (accounting for bottle height + access space). For 1.5L large bottles, allocate over 40cm per shelf. Request adjustable shelves to accommodate future format changes without wasting space.
II. Cooling Method: Direct Cooling vs. Air Cooling – Choose Wisely to Avoid Regrets
Beer’s taste relies entirely on temperature preservation, and the cooling method directly impacts the experience. Don’t blindly choose the most expensive option:
Direct cooling is the cost-effective choice, ideal for beer enthusiasts on a budget. Its principle resembles old-style refrigerators, using copper pipes on the inner walls for cooling. Advantages include fast cooling, low energy consumption, and affordability, making it suitable for storing regular bottled/canned beer. Drawbacks include frequent frost buildup requiring manual defrosting (typically every 1-2 months) and uneven internal temperatures, with cooler spots near the walls. For custom small cabinets (≤100L capacity), direct cooling is perfectly adequate.
Air-cooled is the maintenance-free choice, ideal for craft beer enthusiasts. It uses fans to circulate cold air for cooling. Advantages include no frost buildup, uniform temperature (temperature variation controllable within ±1°C), and better preservation of craft beer’s flavor profile. Suitable for storing temperature-sensitive beers like IPAs and stouts. Disadvantages include a slightly higher price point, slightly higher energy consumption compared to direct cooling, and some models may produce mild fan noise during operation (silent fans can be requested during customization).
Tip: Regardless of cooling method, verify the temperature control range—the optimal beer storage temperature is 3-8°C. When customizing, request a 2-10°C range to accommodate diverse beer types.
III. Materials: Prioritize Both Aesthetics and Durability
The materials of a beer cooler directly impact its appearance, durability, and safety. Focus on these three key aspects:
The exterior material should complement your home decor style, prioritizing scratch-resistant options. Common choices include stainless steel, solid wood, and painted sheet metal. Stainless steel (especially 304 grade) offers corrosion resistance and easy cleaning, making it ideal for modern minimalist or industrial-style interiors; Solid wood (oak, walnut, etc.) offers rich texture, fitting American or Chinese-style interiors, but ensure it’s moisture-proof treated (to prevent warping from internal humidity); Painted sheet metal comes in diverse colors, customizable to match walls or cabinets, ideal for built-in installations—opt for matte finishes (to minimize dirt-revealing reflections and enhance scratch resistance).
The inner liner must be food-grade material. As it directly contacts beer, insist the manufacturer uses food-grade 304 stainless steel or ABS plastic—odorless and corrosion-resistant—to prevent harmful substances from inferior materials contaminating the beer. Additionally, the liner should ideally feature anti-condensation design, especially in humid southern regions, to prevent moisture buildup on the inner walls that could damage beer labels.
The “small detail” of gaskets: Gaskets determine the beer cabinet’s insulation effectiveness. When selecting, check the gasket’s elasticity (it should quickly spring back after being pressed) and sealing ability (insert a piece of paper between the door and cabinet; it shouldn’t come out when pulled firmly). Opt for food-grade silicone material, which is heat-resistant and resistant to aging.
IV. Features: Customize to Need, Avoid Overpaying for “Useless Extras”
A compact beer fridge doesn’t need “full functionality.” Focus on practical features that align with your needs:
Humidity control is essential. While standard beers have minimal humidity requirements, craft beers (especially bottled varieties with labels) need 50%-70% humidity to prevent label cracking and beer oxidation. Request a humidity control system during customization or choose an inner liner with a moisture-retaining layer.
LED Strip Lighting: Aesthetic Appeal Meets Functionality To make your beer fridge a home decor highlight, LED strip lighting is essential. Opt for cool-toned LEDs (to avoid heat affecting internal temperature) installed beneath shelves or along the cabinet ceiling. This allows clear visibility of your collection while creating an immersive ambiance. Ensure the lighting has an independent switch to avoid constant power consumption.
Comprehensive Locking Options: A Must for Households with Children or Pets. If you have children or pets, be sure to add locking mechanisms (either mechanical or electronic) during customization. This prevents accidental opening that could cause beer spills or children accessing alcohol.
Drainage Function: A Key Consideration for Built-In Models. Direct-cool beer cabinets produce condensation during defrost cycles. Built-in units cannot manually drain this water, so request the manufacturer to install a drain pump or drainage hole. This directs condensation to nearby plumbing, preventing water buildup that could damage the cabinet or flooring.
V. Choosing a Vendor: Don’t Just Look at Price—These 3 Points Matter More
For custom products, the vendor’s capabilities directly determine product quality and after-sales service. When selecting, focus on these three points:
Customization experience is crucial. Prioritize vendors specializing in refrigeration equipment—avoid generic furniture customizers (who typically lack expertise in refrigeration systems). Select manufacturers with proven experience in crafting beer cabinets/refrigerators, ideally those who can showcase similar custom projects (e.g., compact built-in beer cabinets, custom-shaped beer cabinets).
Ensure the refrigeration system carries at least a 1-year warranty. The compressor is the heart of the beer cabinet. When customizing, clarify the compressor brand (e.g., Embraco, Danfoss) and warranty period. Ideally, request a full-unit warranty exceeding 1 year and a 3-year compressor warranty to prevent issues with unresolved cooling failures later.
Detailed Quotation: Before customization, insist on a comprehensive quote specifying all included items (e.g., exterior material, interior material, cooling method, functional accessories, installation fees). This prevents later charges justified as “custom modifications” or “additional features.” Confirm upfront costs like installation fees for built-in models and LED strip lighting expenses.
VI. Details: Overlooked Issues That Impact User Experience
Beyond the core points above, several easily overlooked details directly affect usability:
Opt for Double-Pane Tempered Glass Doors: Choose double-pane insulated tempered glass for superior insulation (preventing cold air loss and reducing energy consumption). Tempered glass is also shatter-resistant, enhancing safety. For enhanced privacy, frosted glass is an option. Built-in vs. Freestanding Models: Freestanding beer cabinets typically vent heat from the rear, requiring adequate clearance behind the unit. Built-in models usually vent from the top or bottom. When customizing, confirm vent locations with the supplier to avoid conflicts with adjacent cabinets and ensure vents remain unobstructed. Always Test Operation After Installation: After installing the beer cabinet, resist the urge to immediately stock it with beer. Instead, power it on and run a 24-hour test cycle. Ensure Proper Ventilation: Verify that all vents are unobstructed and functioning correctly. Maintain Regular Cleaning: Regularly wipe down the exterior and clean the interior shelves to prevent condensation buildup and maintain hygiene. Regularly Check the Temperature: Monitor the internal temperature periodically to ensure it remains within the optimal range for beer storage. Regularly Check the Water Drain: Ensure the water drain is functioning properly and free of blockages. Regularly Check the Power Supply: Ensure the power supply is stable and uninterrupted. Regularly Check the Cooling System: Periodically inspect the cooling system for any signs of malfunction or unusual noise. Regularly Check the Compressor: Periodically check the compressor for any signs of overheating or unusual noise
Always test the unit after installation. After installing the beer cooler, don’t rush to add beer. First, power it on and run a 24-hour test: Check cooling performance (set to 5°C; verify internal temperature stabilizes between 3-8°C after 24 hours), noise levels (fan noise should ≤40 decibels during operation, causing minimal disruption), and seal integrity (after closing the door, touch the door edges—no noticeable cold air leakage should be felt).
To summarize: Customizing a compact beer cabinet hinges on “aligning with needs + balancing practicality.” First, determine your placement location and preferred beer types. Then, select vendors based on core factors like dimensions, cooling method, materials, and features. Finally, pay close attention to details and after-sales service to avoid most pitfalls.
Post time: Dec-15-2025 Views: